Combination Squares
View all combination squares from Johnson Level.
Parts of a Combination Square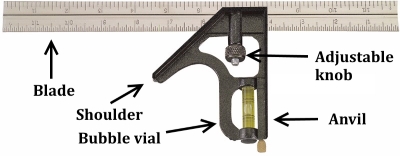 |
What is a Combination Square?
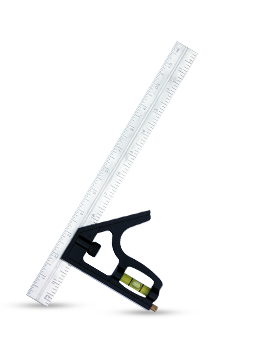
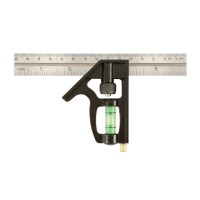
A combination square is a multi-use measuring instrument which is primarily used for ensuring the integrity of a 90° angle, measuring a 45° angle, measuring the center of a circular object, find depth, and simple distance measurements. It can also be used to determine level and plumb using its spirit level vial. If you need a guide on how to use a spirit level, take a look at our information page. The versatility of the combination square insures its dominance over any other square in its class.
Terminology
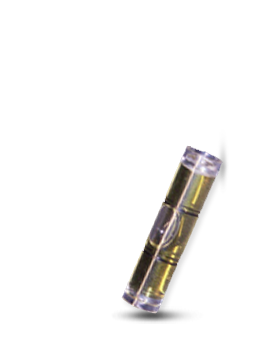
Before using a combination square, one must first be familiar with the structure and terminology of the square itself. A combination square consists of a rue-type blade attached to a handle. The handle is composed of two parts, a shoulder and an anvil. The shoulder is placed at an angle of 45° between itself and the blade. It is therefore used for the measurement and layout of miters. The anvil is placed at a 90° angle between itself and the blade. The handle contains an adjustable knob which allows it to move freely horizontally along the edge of the ruler so that it may be tailored towards any size job. Additionally, contained within the head of the handle is a scriber used for marking measurements and a vial which may be used for measuring plumb and level.
Testing for Accuracy
Regardless of the job being undertaken, the first step when using a combination square is to check the square to ensure its accuracy. This task can be easily accomplished by first taping a white piece of paper to a board with a perfectly straight edge. Place the anvil of the square against this edge and draw a line on the outside edge of the blade. Once this is complete, turn over the square and draw a second line at least 1/32 in. away from the first line drawn. If the two lines drawn are parallel with each other, then it can be said that the combination square is accurate.
To test the accuracy of the shoulder, one may simply gauge the angle it makes with the blade against a 45° drafting triangle. If the angle between the shoulder and the blade is the same as that of the triangle, then the square is accurate.
How To Use a Combination Square
- Place the anvil of the square against the edge of the working surface you wish to cut.
- Draw a line along the blade edge until your pencil reaches the anvil of the combination square.
- Once completed, the line should be a perfect 90° angle with the edge of the working surface.
 How to Use a Combination Square for Angles
- Place the shoulder of the square against the edge of the working surface you wish to cut.
- Draw a line along the blade edge until your pencil reaches the shoulder of the combination square.
- Once completed, the line should be a perfect 45° angle with the edge of the working surface.
To draw a line parallel to the edge of wood being used:
- Place the anvil of the combination square along the edge of the working surface.
- Place your pencil at the end of the blade ruler.
- Put pressure on the end of the blade rule with your pencil and move the handle side along the work surface, allowing your pencil to follow with the motion of the handle.
- Once this has been done for the desired length, lift your pencil and combination square to notice the parallel line along the working surface.
To use the blade as a normal ruler:
- Loosen the adjustable knob.
- Slide the handle off the blade.
- Utilize the blade as a ruler.
To use the handle as a level:
- Loosen the adjustable knob.
- Slide the handle off of the blade.
- Utilize the handle as a normal level by placing the anvil side of the handle upon any surface wished to be measured.
- Read the vial to ensure levelness. If the bubble is in the middle of the vial, it is level.
To use the combination square to check for plumb:
- Place the outside edge of the blade against the vertical surface that is to be measured.
- Ensure that the bubble is in the middle of the vial.
For more how to use information, visit our how to use levels and tools guide.
View all combination squares from Johnson Level.
