


Line Laser Levels
View all line laser levels from Johnson Level.
Today, the three most common types of laser levels are Rotary Laser Levels, Laser Line Levels (or Line Generators) and Dot Laser Levels (or Multi-Point Lasers). This article focuses on the technical specifications of Laser Line Levels.
Line Laser Levels
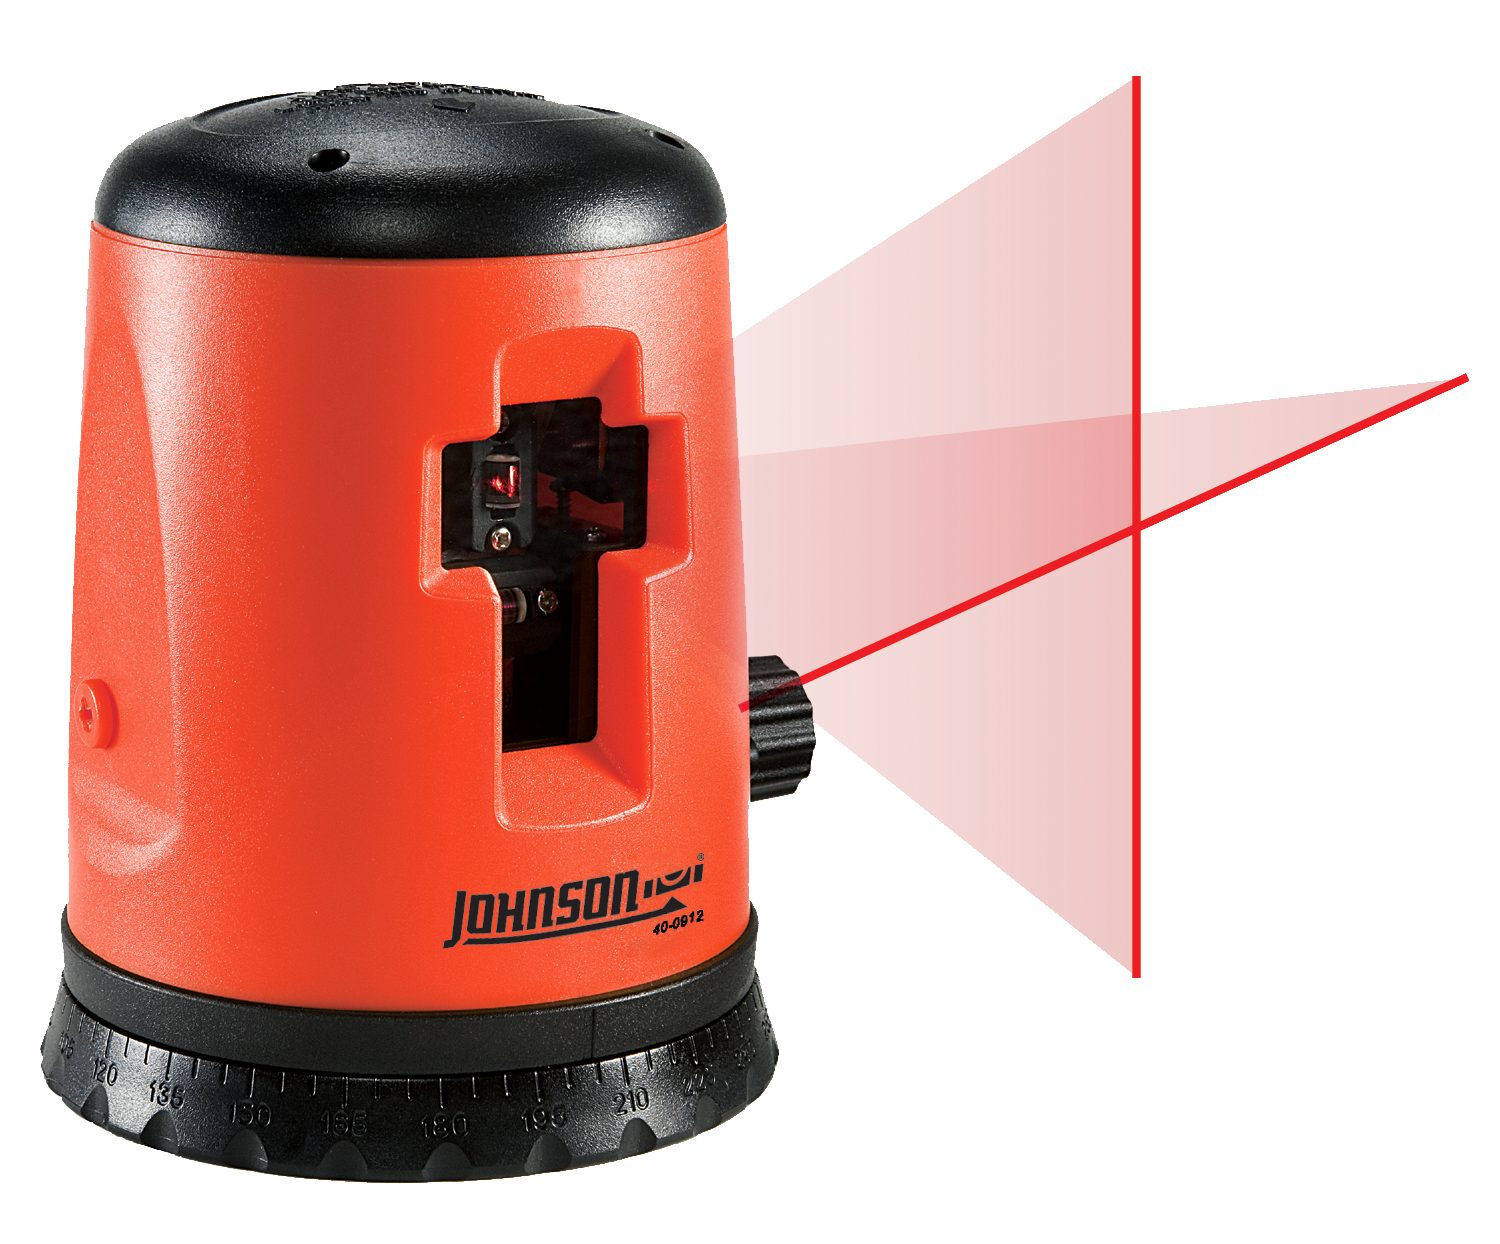
Line Laser Levels project a beam of light typically 180-degrees both horizontally and vertically, allowing the user to establish a horizontal or vertical plane. Some Laser Line Levels can also project a beam of light 360-degrees. In fact, this beam of light is really a single dot of light that when projected through a beam spreading prism, projects a 180 or 360-degree chalk line. When working indoors, the Line Laser Level is useful for anything needing horizontal leveling around a room or a vertical leveling from floor to ceiling.
The beam of light is created by what is called a diode, which in this case is simply a semiconductor which produces light when current passes through it. We see diodes everyday on our CD players, computers and television remote controls.
Color - Laser Level Wavelength
Color is technically determined by the wavelength of the laser (the laser diode), which is measured in nanometers (nm), one billionth of a meter. Because of its very small length, the spectrum of color visible to the human eye is between 380 nm (purple) and 750 nm (red). Typically, the color of the laser is red (635 nm) or green (532 nm), which is near the center of the spectrum, making it the most visible to the human eye. Johnson Level's green-beam laser system is called GreenBrite Technology. It is at least 400% brighter and more visible than a red laser. Regardless of the color, you will not be able to see the light from the Line Laser Level outside, you always need a Laser Detector in daylight.
Intensity - Laser Level Classification
The intensity of the laser is determined by the level of laser light power which is measured in milliwatts (mw), 0.001 or one-thousandth of a watt Class I and II lasers are low power from below 0.4 mw to 1 mw. Typically, laser levels are Class IIIA, which is between 1 mw and 5 mw. Although you should not stare at it, the laser is safe if it catches your eye. The closer your laser is to 5 mw (the brighter), the more expensive it is. Since Class IIIB lasers which range from 5 mw to 500 mw and require controls, and Class IV lasers are high power lasers above 500 mw, which are hazardous to view under any condition, they are typically not used for leveling tools.
Laser Level Accuracy
Accuracy of a line laser level ranges from +/- ½" to +/- 1/8" 50 feet. Although this accuracy is greater than a spirit level (or bubble level), a spirit level cannot give you the distance a laser level can.
Laser Levels Working Range
How far the line laser goes is typically specified in terms of feet in diameter. Since the Line Laser Level is the center of the range, the distance in any one direction is the radius, or one-half the diameter specified. The range can be up to 300 feet in diameter with a detector (most likely used outside due to the distance and inability to see the laser outside).
Line Levels are an Affordable Alternative to Laser Line Levels
While self-leveling line laser levels are the most accurate and time-efficient way to find level over longer distances, a spirit line level can be an attractive option for cost-concious buyers. Line levels can be placed on a tightly pulled string tied over longer distances than regular spirit levels, and if set up properly, find level just as well as laser line levels over reasonable lengths.
How To Use a Line Laser Level
- Set up the laser line level on as flat (level) of a surface as possible. A saw horse or even a bucket is good. Any sort of tripod is usually best.
- Make sure the level is level.
- Manual leveling: The operator make the laser level by adjusting the laser to bubble vials built into the laser. Accuracy is going to depend on the quality of the level vial and the operator's eye. Although accuracy can be 1/2" per 20 feet and setup is longer due to the manual leveling, it is the least expensive laser available.
- Self-Leveling: The laser levels itself through a pendulum and magnets. Accuracy is typically 1/8'' per 50 feet, which is better than manual.
- Begin measuring and marking.
- Once you have a level line, use it for reference.
- Make marks on the laser line and then measure down or up from there. Make all necessary marks before turning the laser level off.
- Turn off the laser. You’re ready to go!
How to Use a Self Leveling Laser Level
- Place the self leveling laser on a flat surface or a tripod.
- If there is a "manual mode" feature, ensure it is off by making sure the manual mode LED is off.
- Turn on the laser level.
- Allow the laser level a moment (about 30 seconds), to level itself.
- The laser level emits a line in its specified range.
- You are ready to make measurements.
Now that you are familiar with the technical specifications of a Line Laser Level, you are now ready to understand how Laser Line Levels are used by contractors.
For more instructions on how to use our wide variety of levels, consult Johnson Level's how-to guide.
View all laser line levels from Johnson Level.